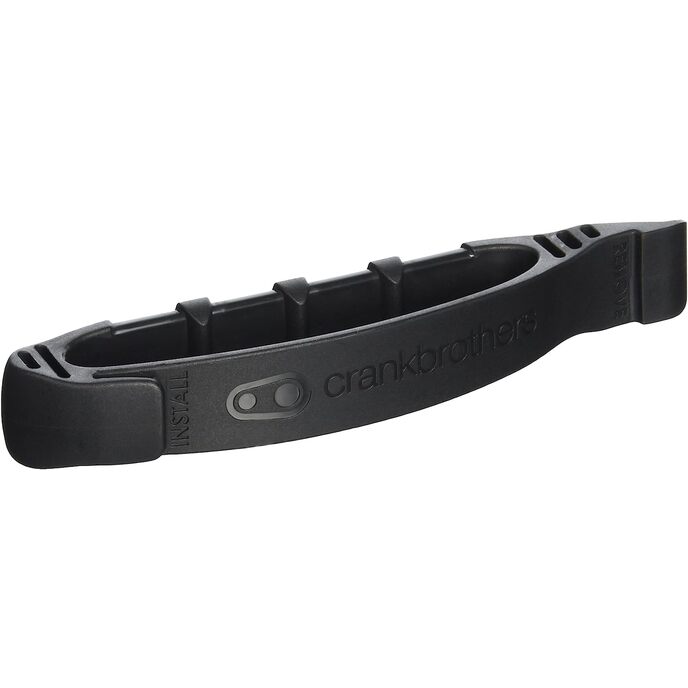
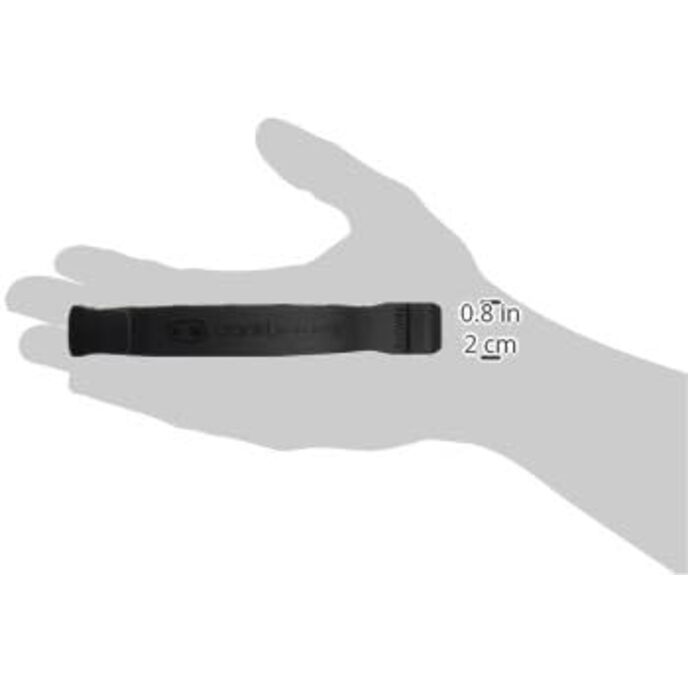
I’ve changed a lot of bike tires and replaced/repaired lots of tubes since I started biking as a kid. Probably most of those reading this blog post have. For me that included tires and tubes ranging from way back with the huge ones on the first bike I had – an antique cruiser bike (the original type that was already decades old when I was given it, the kind with the giant spring and facade metal work, not the modern retro models) up through thin (and sometimes tighter and harder to change) road bike tires and tubes. Ah, and there’s nothing like being on a nice ride or almost through a metric century or something and blowing a tire and having to fix it beside the road. Holes, cuts, slashes, and worn out tubes and tires – some day you have to change a tire or have someone else do it for you. Well, unless you are my Canadian friend Stephen who has had supremely good ‘flat’ luck. There’s probably a Canadian joke in there somewhere but I’m not clever enough to come up with one. So anyway… I’ve gotten pretty good at changing tires and can change a tire in a short time using conventional tire levers. Some are good, some are bad and bend, some have funny shapes that are made to supposedly ease how they fit or work. But before I go any further I want to side-track for a short, and I want to mention that I have dramatically decreased the number of flats I have had in the last few years by using Stop Flats2 tire liners (make sure you get the right color for the right size tire). These are an extra piece of protection between the tire and tube in the form of a plastic or nylon or other material that goes around the outer part of the tire. This doesn’t protect your sidewall but of course the vast majority of road debris is going to be coming through the part of the tire that’s actually touching the road. Weight weenies will complain I suppose. But liners are great and the small amount of weight these thing pieces are is negligible at worse. You can also get Continental Gatorskins or other comparable anti-puncture tire but you’re doing the same as putting the liner in a regular tire, for the most part. If you’re like me you remember as a kid cutting up old tubes and doing the same thing to stop punctures, which many times was amazingly effective but the tubes in those days were quite a bit thicker than the tubes now are, adding weight and mass. With the modern liners I am using there have been times when I have noticed huge holes and cuts in the tire that would have ripped up my tube, but the liner had done its job and protected the tube and in fact the liner itself is usually pristine, while the tire itself might look like it’s been through a war zone. Hell, I’ll usually still ride on it for a while with no problems. I don’t like to ride on the nasty detritus-strewn local roads around here without liners. But once in a while even the liners don’t stop a particularly big piece of metal, a long screw, or big pieces of glass. It seems to me; at least from my casual observation, that there are more rear tire flats than front. I suspect that many times the piece of sharp junk has come to lay relatively flat, over time, and the front tire pulls it up, or disturbs it in such a way as to position it for the rear tire to be penetrated. And some of this stuff will go through anything – liners, puncture-proof tires, etc. And of course tires wear out in general and get old, as well as tubes. Or you need to change to a different tire for a different surface or upgrade your tires or tubes, switch to a trainer tire or something lighter or something thinner or whatever, etc. There’s usually a need to change tires or tubes at some point. So anyway, on to the actual review after this sidetrack. I thought I’d like to try one of the so-called quick change tire levers or tools out there – both for my own evaluation and use as well as for a nice blog review. Especially I want to be able to change tires easier (and quicker) under colder conditions when it’s much harder and more time-consuming in some cases, and hard on the hands. A quicker change in general is a big bonus of course! I decided to give the Crank Brothers Speedier Tire Lever a try as it got great reviews across the internet generally, and was usually mentioned along with other quick change and easier change tire levers and tools and lists thereof. After carefully examining pictures of the Crank Brothers tool online; I could see the concept seemed to make a lot of sense. But would what looks like a good idea translate to real life? The lever came relatively quick, in the bottom of the Amazon box that my brand new tire had shipped in (I confess that I didn’t notice the lever there in the bottom of the box at first). I want to mention here before I go any further that the tool does have a lifetime warranty. I know from some reviews that people have managed to break it right off the bat, I suspect incorrect usage and lack of experience and common sense. Or maybe a bad lever. Visually, the lever looks moderately heavy-duty compared to many tire levers, but it is a bit wide to carry in a bike seat bag due to the double pieces that you put your hand through. Considering the ease of use (that I will get to shortly) of the Crank Brothers Speedier Tire Lever it may well be worth the extra mm’s of space it takes up, and you should be able to replace your two or three normal tire levers with just this one. BTW, there is a Crank Brothers Speed Lever Tool also, a little bit older. Notice the difference between the “Speed” and “Speedier” moniker. The Speed Lever uses a different concept, attaching to the hub and letting you crank it around. I couldn’t find it on Amazon but if you look around a bit you will likely come across a video on it, and maybe one kicking around for sale. 20190706_143123The packaging that the tire lever is attached to has a little visual instruction on the inside of the folded cardboard but the lever itself also has a very self-explanatory “REMOVE” and “INSTALL” printed right on the lever itself at opposite ends, just in case you forget or something. After familiarizing myself with the printed instructions I took a closer look at the lever. In a way it looks maybe, kinda similar to a traditional tire lever but with additional open area in the middle. Kind of, I suppose, as if you took two tire levers and bent them outward in the middle and attached them at the ends so you put your hand through the middle where it would be protected from touching the rim when running it around the wheel. Yep, the idea here is to make sure your hand and knuckles don’t get bumped, hit, cut, or burned from sliding it around the rim. This is good also because if there is a piece of metal or something jammed in the rim or a marred rim edge then you are also protected from all of that. So I gave the tool a try on my front road bike wheel, the tire of which needed to be replaced after thousands of miles and a little dry rot and tons of holes and cuts (again, this stuff would have caused multiple flats if I hadn’t been using tire liners. Yea, I can’t say enough about them. One of the things people mentioned as well as is referenced in the description for the tool is how quickly you can use it to slip around the rim to get the tire off, and back on again. You use the REMOVE end, slipping the hooked part under the bead, and positioning the little ridge that is situated a little below the hook down against the wheel rim. Then you slip your fingers through the opening and start sliding the tool around the rim. This is where I noticed that it is possible to accidentally catch or pinch the tube as you do this if you are not careful. After testing on various tires it seems that this is much less likely to happen with a wider tire like a mountain bike tire and more likely with thinner tires. I especially noticed that with tubes that are on the larger range compared to the size of the tire are more likely to take